Hey Everyone,
I get asked all the time what mascara do I use, how are your lashes so long, are your lashes fake?! Well here's the thing my natural lashes are pretty decent sized but...there are few tricks that I learnt that play up my lashes really well and ill explain them all in this blog post.
Tip 1: Formulation
You need to find the right mascara formula that works best for your lashes. This is all through trial and error trust me Ive had my fair share of mascara's from high and low ends!
Voila! my handful of mascaras! If your lashes are really stick straight and not too long, go with a formula that isn't too wet because that will weigh them down more (choose something in the middle like the Buxom Mascaras found at sephora) just make sure you curl your lashes with a lash curler first at add some lift!
These type of brushes (pics below) are really really good for separation and volume at the same time! the one below is a wonderful light formulation doesn't leave your lashes heavy and awesome for everyday.
The buxom mascara below is a tiny bit more on the wet side but its really really black and dramatic!
On the other hand in your eye lashes are really sparse and thin choose a THICKER formula but separating at the same time (try the Covergirl Lashblast for separation and thickness or Loreal Voluminous below which is my favourite all time for a lot of volume but its not really separating so you might need to get a mascara wand and comb through your lashes with it after which is what I do I always end up using two mascaras for the best results even on clients)
Tip 2: The right wand
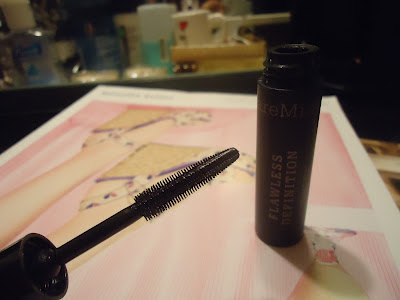
If you find a formula that works but not the right wand do what I do and double up I start with my Buxom lash mascara (2nd picture in this blog post) make sure my lashes are coated and separated and then add Loreal voluminous on top for a fuller effect and if I'm going out then ill use the smaller buxom mascara for a more dark dramatic look) that has a more compact wand and disposes MORE product. Try to use a smaller wand if you have harder to work with lashes it'll save you from have mascara spots all over your eye lids which can ruin your eyeshadow aswell. Another thing to remember is that small wands are wonderful for the lower lash line like the two pictures below of the Bare minerals mascara and the Rimmel Lash Max (these brushes will coat ALL the little lashes on your lower lashline giving a more cleaner and separated look)
Tip 3: Curl!
Always use an eyelash curler even if you think "yea right my lashes wont curl"..... just curl them! Try to curl at the base of the lashline 2 pumps and then move the curler up a tiny bit to the middle of your lashes and curl once more. This will ensure a smooth curl.
That's all for the mascara tips that I have so far. Let me know what you guys think and if this helps! and comment if you want more posts on mascara reviews or lash care posts (Ive been testing out a few things) until then, Take care :)


